Getting Started
System Requirements
Hardware
| Component | Specification |
|---|---|
| Server | CXL 2.0 compatible platform (Intel GNR, AMD Turin) |
| SSD | NVMe U.2, EDSFF (E1 / E3) |
| Cable | MCIOx8 to U.2, MCIOx8 to EDSFF |
Software
| Component | Specification |
|---|---|
| OS | Ubuntu 24.04 |
| Kernel | 6.8.0-101-generic or later |
| CLI Tool | xcena_cli (included in SDK) |
Hardware Setting Guide
Cable and SSD Connection Guide
Note: For MX1P, the MCIO connector splits an ×8 lane into two ×4 ports (P1 and P2). The SSD must be connected to P1 — the first four lanes. Connecting to P2 will result in the SSD not being recognized and InfiniteMemory will not function.
Connecting an EDSFF SSD
-
Align the SSD with the connector.
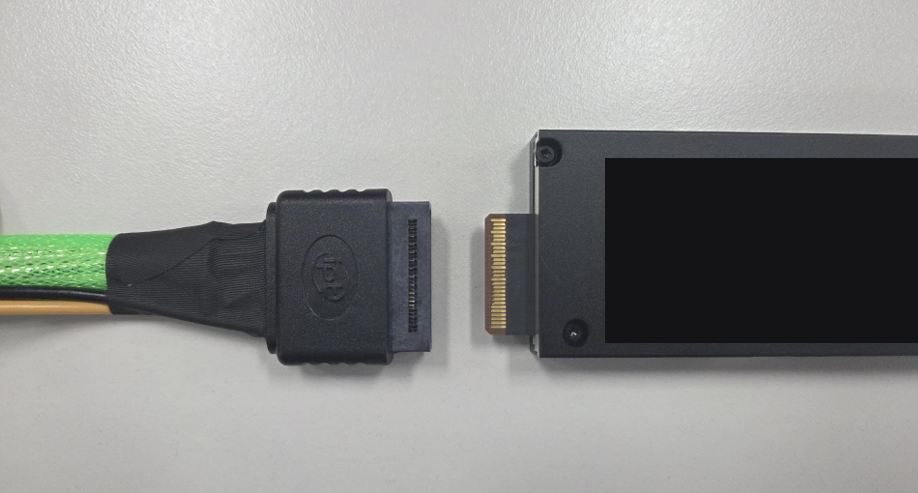
Match the small triangle mark on the connector with the five elongated gold-finger contacts on the EDSFF SSD. Inserting the SSD in the wrong orientation will cause permanent damage to the SSD.
WARNING: Booting with a reverse-inserted SSD will permanently damage it.
-
Connect the power cable.
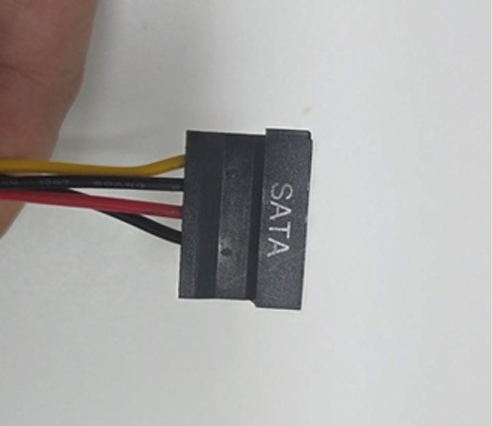
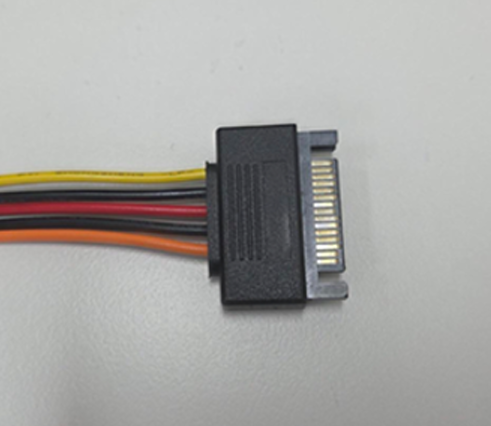
Connect the connector’s power cable to the SATA power cable. Both connectors must be seated fully. The SATA power cable can be identified by its distinctive L-shaped bracket.
Connecting a U.2 SSD
-
Connect the SSD to the connector.
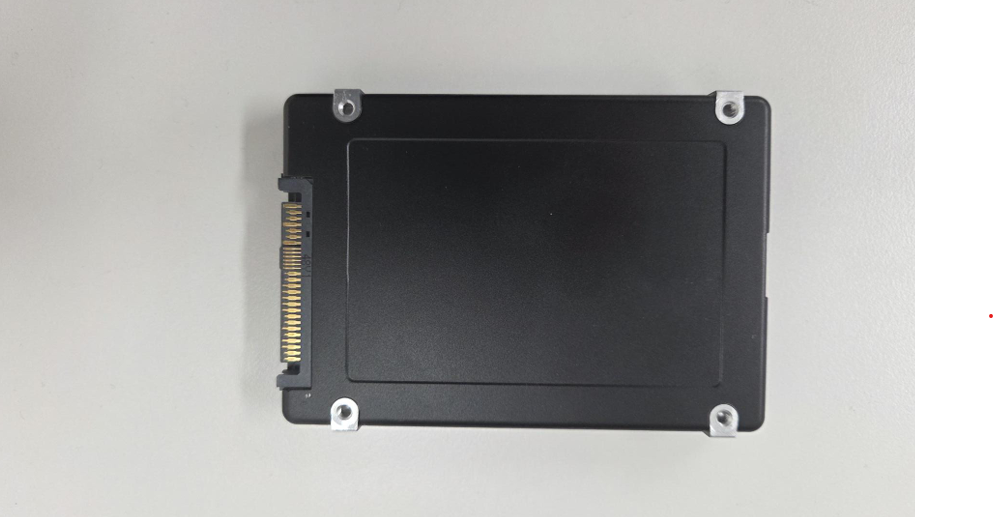
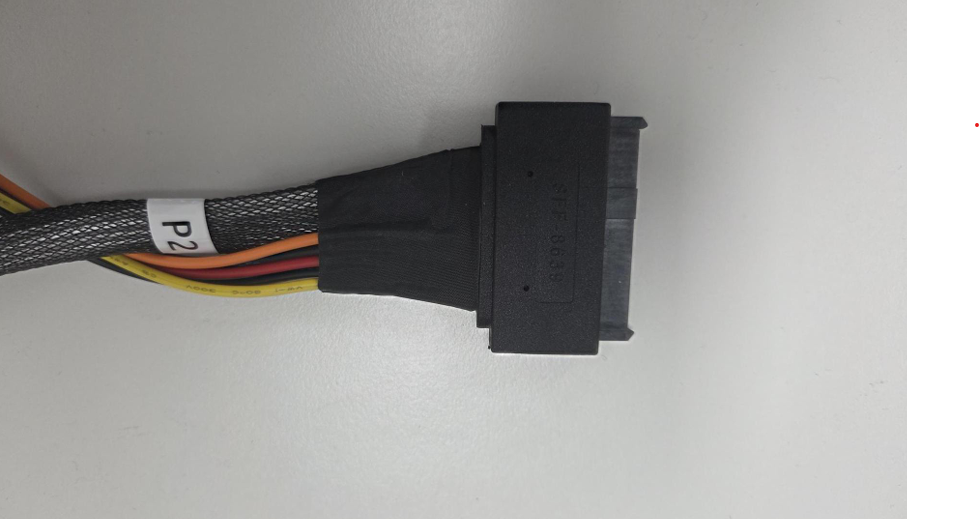
Align and insert the U.2 SSD into the connector until it is fully seated.
-
Connect the power cable.
Connect the connector’s power cable to the SATA power cable, same as the EDSFF power connection described above.
Connecting the MCIO Cable to the Device
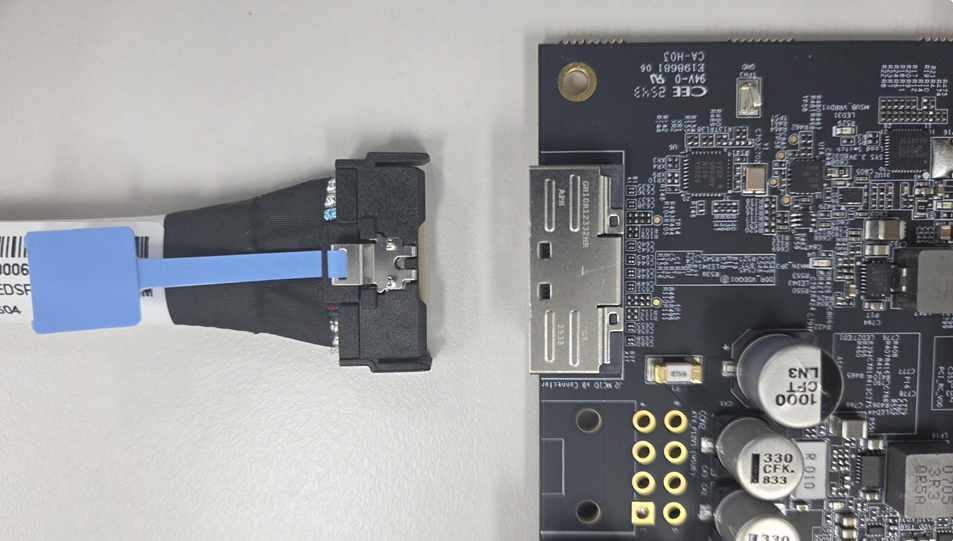
Connect the other end of the cable to the MCIO port on the device as shown above.
BIOS Configuration
Intel (GNR)
No BIOS changes are required for normal operation. If you need to use more than 24 TB of CXL capacity (InfiniteMemory), raise the MMIO High Base above its default value of 120 TB.
AMD (Turin)
Three settings must be configured before booting with InfiniteMemory:
- SPM (Special Purpose Memory) — navigate to
AMD CBS → CXL Common Options → CXL Memory Attributeand set it to Enabled. If disabled, CXL memory boots as standard system-ram and cannot be reconfigured as DAX. - CPU address space — navigate to
AMD CBS → CXL Common Options → CXL Physical Addressingand set it to System address. Any other value causes an SPA/HPA mismatch that prevents CXL Region creation. - MSI multi-vector — navigate to
AMD CBS → NBIO Common Options → IOMMU/Security → IOMMUand set it to Enabled.
Installing xcena_cli
xcena_cli is provided as part of the XCENA SDK. Refer to the XCENA SDK — Installation Guide.
Firmware Update Procedure
WARNING: Ensure no application is accessing the device during the update process.
Step 1 — Check current device status
sudo xcena_cli fw-info 0
Review the output to identify:
- Current firmware revision
- Active slot number
- Available (non-active) slots
Step 2 — Flash the firmware
Write the new binary to a non-active slot:
sudo xcena_cli fw-update 0 <Target_Slot_ID> <release_binary>.bin
| Parameter | Description |
|---|---|
0 | Device ID |
Target_Slot_ID | Non-active slot number |
<binary>.bin | Firmware binary file (e.g., release_v_1_0_8.bin) |
IMPORTANT: Do NOT flash to the active slot. This may cause an update failure.
Step 3 — Apply firmware (cold boot)
A power cycle (cold boot) is required — a warm reboot is not sufficient.
- Shut down the system completely.
- Power on the system.
-
Verify the update:
sudo xcena_cli fw-info 0
Confirm the Active Slot has switched to the newly flashed slot with the expected firmware version.